Hello Fellow Yuneec Pilot!
Join our free Yuneec community and remove this annoying banner!
Sign up

Yuneec Typhoon with ST16

SUCCESS!!!
At least I think so. I've been trying many combinations. None seemed to produce any results except a change in the order of installing things.
The full cycle that resulted in success is somewhat cumbersome. I know you guys are already long asleep as I write this, and it is getting late on this side of the Atlantic as well.
The general steps listed below start with the ST16 in the ST16 mode with failed control devices, failed GPS, no drone signal on the Bind Screen, possibly no battery charger or USB access to your PC. Some or all of which may be the current state of @Cobra1974's ST16. This is a very broadly stated version of the sequence. Better instructions will probably be needed. However:

Stage one: Convert the ST16 to ST16S for H520 firmware.
Factory reset the controller. Download the DataPilot APK and Updaterapp.apk. Ensure the controller is already turned on. Insert the SD card. Install and open the DataPilot.APK first. Then install the UpdaterAPP.APK. Run the Updater multiple times until the controller is fully converted to H520 related controller firmware. Do not install any drone or camera related firmware. Stage 1: Convert to H520 ST16S Firmware

Stage two: Install ST16E firmware for H520E
Factory reset again. Download the DataPilot2 APK and the update.zip. Ensure the controller is already turned on. Insert the SD card. Install and open the DataPilot 2 APK first. Then restart the controller to install the update.zip. Do not attempt to install any other H520E related firmware. Stage 2: Install ST16E Firmware

Stage three: Return the controller to standard Version 3.1.30 ST16 firmware.
Factory reset again. Download the firmware folder and update.zip. Insert the SD card. Restart the controller to install the update.zip. Leave the SD card in the controller after the controller returns to the main screen. Leave the controller turned on.

Stage Four: Update the TX and RF systems
This stage is not in the original instructions, and it does not seem to work after running the original instructions. It is not needed for interchanges between ST16 and the various ST16S versions. It was not needed for all of the experiments but was for most. The update screen is accessed by tapping "Systems Settings", then rapidly tapping "About Controller" until the Test Menu appears. Select "Firmware Upgrade" at the bottom of the Menu.
Choose "st16_transmitter_mcu_encryption_app_main_v00.27.bin" for the TX file and "sr24_tx_en_v01.10" for the RF file. The required files are already on the SD card and will appear as choices on the screen.

Stage Five: Remove the SD card. Finish the normal update/factory reset items such as create a new "Model", bind to it, set time/date and connect Wifi (if desired).

I will try to get some folders organized and loaded with the needed firmware tonight. If so, I will update the "stages" with the links.

You can, of course, try to update the TX and RF (stage 4) first to avoid all the other "stages". That did not work for either of the controllers I used for experimenting, but it would certainly be great if it worked for yours.


General Notes:
"Pad" is accessed using the return key at lower right of screen for all firmware other than ST16.

Installing "APK" files
requires checking the box for "Pad/Settings/Security/Unknown Sources". The box will have to be checked after each Factory reset. APK files can generally be run from either the SD card or after making a copy on the controller directory. The files were copied to the controller for most of these experiments.

DO NOT UNZIP the "update.zip" files.

Installing "Update.zip" files is accomplished by placing the files on the SD card, placing the card in the controller, and starting the controller. Then wait. It takes a while, and will restart a time or two. It does it without help.
 
Also, Controller GPS is not detecting satellites.
Controller Bind page can detect and bind to the camera, but not to the drone.
This is one more proof that st16_transmitter_mcu_encryption_app_main_v00.27.bin belongs to the STM32 on the flight controller board in the lower middle place in the ST16. I think we can call it MCU board.

br HE
 
I personally prefer a functional description of things. Doesn't matter, let's be an MCU.
 
SUCCESS!!!
At least I think so. I've been trying many combinations. None seemed to produce any results except a change in the order of installing things.
The full cycle that resulted in success is somewhat cumbersome. I know you guys are already long asleep as I write this, and it is getting late on this side of the Atlantic as well.
The general steps listed below start with the ST16 in the ST16 mode with failed control devices, failed GPS, no drone signal on the Bind Screen, possibly no battery charger or USB access to your PC. Some or all of which may be the current state of @Cobra1974's ST16. This is a very broadly stated version of the sequence. Better instructions will probably be needed. However:

Stage one: Convert the ST16 to ST16S for H520 firmware.
Factory reset the controller. Download the DataPilot APK and Updaterapp.apk. Ensure the controller is already turned on. Insert the SD card. Install and open the DataPilot.APK first. Then install the UpdaterAPP.APK. Run the Updater multiple times until the controller is fully converted to H520 related controller firmware. Do not install any drone or camera related firmware. Stage 1: Convert to H520 ST16S Firmware

Stage two: Install ST16E firmware for H520E
Factory reset again. Download the DataPilot2 APK and the update.zip. Ensure the controller is already turned on. Insert the SD card. Install and open the DataPilot 2 APK first. Then restart the controller to install the update.zip. Do not attempt to install any other H520E related irmware. Stage 2: Install ST16E Firmware

Stage three: Return the controller to standard Version 3.1.30 ST16 firmware.
Factory reset again. Download the firmware folder and update.zip. Insert the SD card. Restart the controller to install the update.zip. Leave the SD card in the controller after the controller returns to the main screen. Leave the controller turned on.

Stage Four: Update the TX and RF systems
This stage is not in the original instructions, and it does not seem to work after running the original instructions. It is not needed for interchanges between ST16 and the various ST16S versions. It was not needed for all of the experiments but was for most. The update screen is accessed by tapping "Systems Settings", then rapidly tapping "About Controller" until the Test Menu appears. Select "Firmware Upgrade" at the bottom of the Menu.
Choose "st16_transmitter_mcu_encryption_app_main_v00.27.bin" for the TX file and "sr24_tx_en_v01.10" for the RF file. The required files are already on the SD card and will appear as choices on the screen.

Stage Five: Remove the SD card. Finish the normal update/factory reset items such as create a new "Model", bind to it, set time/date and connect Wifi (if desired).

I will try to get some folders organized and loaded with the needed firmware tonight. If so, I will update the "stages" with the links.

You can, of course, try to update the TX and RF (stage 4) first to avoid all the other "stages". That did not work for either of the controllers I used for experimenting, but it would certainly be great if it worked for yours.


General Notes:
"Pad" is accessed using the return key at lower right of screen for all firmware other than ST16.

Installing "APK" files
requires checking the box for "Pad/Settings/Security/Unknown Sources". The box will have to be checked after each Factory reset. APK files can generally be run from either the SD card or after making a copy on the controller directory. The files were copied to the controller for most of these experiments.

DO NOT UNZIP the "update.zip" files.

Installing "Update.zip" files is accomplished by placing the files on the SD card, placing the card in the controller, and starting the controller. Then wait. It takes a while, and will restart a time or two. It does it without help.
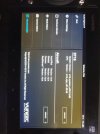
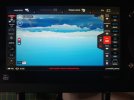
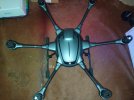
I've got good news and bad news! The good news is that the remote control responds and works again. The bad news is that I can't see the CGo3+ camera or the drone.
Do you have any ideas?
I turned on the drone after the remote control, switched on the wifi and the home network access and then nothing.

PS :
it wasn't specified BUT for Backup&Reset you had to check "Back uo my data" every time?

Thanks
 

Attachments

  • 1690226314198.jpg
    1690226314198.jpg
    1.8 MB · Views: 3
  • 1690226314165.jpg
    1690226314165.jpg
    1.4 MB · Views: 3
  • 1690226314148.jpg
    1690226314148.jpg
    6 MB · Views: 3
SUCCESS!!!
At least I think so. I've been trying many combinations. None seemed to produce any results except a change in the order of installing things.
The full cycle that resulted in success is somewhat cumbersome. I know you guys are already long asleep as I write this, and it is getting late on this side of the Atlantic as well.
The general steps listed below start with the ST16 in the ST16 mode with failed control devices, failed GPS, no drone signal on the Bind Screen, possibly no battery charger or USB access to your PC. Some or all of which may be the current state of @Cobra1974's ST16. This is a very broadly stated version of the sequence. Better instructions will probably be needed. However:

Stage one: Convert the ST16 to ST16S for H520 firmware.
Factory reset the controller. Download the DataPilot APK and Updaterapp.apk. Ensure the controller is already turned on. Insert the SD card. Install and open the DataPilot.APK first. Then install the UpdaterAPP.APK. Run the Updater multiple times until the controller is fully converted to H520 related controller firmware. Do not install any drone or camera related firmware. Stage 1: Convert to H520 ST16S Firmware

Stage two: Install ST16E firmware for H520E
Factory reset again. Download the DataPilot2 APK and the update.zip. Ensure the controller is already turned on. Insert the SD card. Install and open the DataPilot 2 APK first. Then restart the controller to install the update.zip. Do not attempt to install any other H520E related irmware. Stage 2: Install ST16E Firmware

Stage three: Return the controller to standard Version 3.1.30 ST16 firmware.
Factory reset again. Download the firmware folder and update.zip. Insert the SD card. Restart the controller to install the update.zip. Leave the SD card in the controller after the controller returns to the main screen. Leave the controller turned on.

Stage Four: Update the TX and RF systems
This stage is not in the original instructions, and it does not seem to work after running the original instructions. It is not needed for interchanges between ST16 and the various ST16S versions. It was not needed for all of the experiments but was for most. The update screen is accessed by tapping "Systems Settings", then rapidly tapping "About Controller" until the Test Menu appears. Select "Firmware Upgrade" at the bottom of the Menu.
Choose "st16_transmitter_mcu_encryption_app_main_v00.27.bin" for the TX file and "sr24_tx_en_v01.10" for the RF file. The required files are already on the SD card and will appear as choices on the screen.

Stage Five: Remove the SD card. Finish the normal update/factory reset items such as create a new "Model", bind to it, set time/date and connect Wifi (if desired).

I will try to get some folders organized and loaded with the needed firmware tonight. If so, I will update the "stages" with the links.

You can, of course, try to update the TX and RF (stage 4) first to avoid all the other "stages". That did not work for either of the controllers I used for experimenting, but it would certainly be great if it worked for yours.


General Notes:
"Pad" is accessed using the return key at lower right of screen for all firmware other than ST16.

Installing "APK" files
requires checking the box for "Pad/Settings/Security/Unknown Sources". The box will have to be checked after each Factory reset. APK files can generally be run from either the SD card or after making a copy on the controller directory. The files were copied to the controller for most of these experiments.

DO NOT UNZIP the "update.zip" files.

Installing "Update.zip" files is accomplished by placing the files on the SD card, placing the card in the controller, and starting the controller. Then wait. It takes a while, and will restart a time or two. It does it without help.
You're the best! I searched the Forum and found a link to you and it works.
Thank you very much if I can help you? I know that this drone no longer exists and I have a remote control for piece in case you need or for a translation into French of something.

1690228297073.jpg
 

Attachments

  • Typhoon H Binding Verification.pdf
    1.2 MB · Views: 2
Last edited by a moderator:
  • Like
Reactions: WTFDproject
The bad news is that I can't see the CGo3+ camera or the drone.
Do you have any ideas?


PS :
it wasn't specified BUT for Backup&Reset you had to check "Back uo my data" every time?

Your description does not mention that you did the binding sequence for the drone and the camera. If not, the first step is just run the normal binding sequence. If the normal binding sequence still does not restore the drone and camera, you will need to run the full Typhoon H Binding Verification.pdf

The verification is not just "binding instructions". It is a verification of the MANY hidden clues in the binding process. The purpose is to identify abnormal conditions that are preventing a successful bind and to identify the exact point the binding process is failing. That information can assist in determining the best course to remedy the problem.
You will need to perform every step up to the point the verification does not match what you see. Do not skip any steps. Every step must be performed. Even the steps you have no doubt are already in the correct condition. After some preparation steps, the verification falls into a routine of directing an action, then verifying the correct response to the action. When you reach a verification step that does not match what you see, or if you are unsure if it matches, STOP. Report the step number back to the forum, and what you actually saw at that step. We can then go from there.


Edit: This part was written before I saw post #47, in which he had already done the very things I was recommending in Post #48. My Bad. :(


I never back-up the data, but it probably is not a bad idea. The FlightLog data can be important sometimes, and I think it gets erased by a reset.
 
Last edited:
  • Like
Reactions: Cobra1974
Your description does not mention that you did the binding sequence for the drone and the camera. If not, the first step is just run the normal binding sequence. If the normal binding sequence still does not restore the drone and camera, you will need to run the full Typhoon H Binding Verification.pdf
The verification is not just "binding instructions". It is a verification of the MANY hidden clues in the binding process. The purpose is to identify abnormal conditions that are preventing a successful bind and to identify the exact point the binding process is failing. That information can assist in determining the best course to remedy the problem.
You will need to perform every step up to the point the verification does not match what you see. Do not skip any steps. Every step must be performed. Even the steps you have no doubt are already in the correct condition. After some preparation steps, the verification falls into a routine of directing an action, then verifying the correct response to the action. When you reach a verification step that does not match what you see, or if you are unsure if it matches, STOP. Report the step number back to the forum, and what you actually saw at that step. We can then go from there.

I never back-up the data, but it probably is not a bad idea. The FlightLog data can be important sometimes, and I think it gets erased by a reset.
Weather permitting (it's raining at the moment), I'll give you a report on my first flight. Thanks again
 
  • Like
Reactions: WTFDproject
Weather permitting (it's raining at the moment), I'll give you a report on my first flight. Thanks again
Drones are easy to replace. Cameras and people are not. It's good practice to choose an area away from people and remove the camera for the first few flights to ensure all flight characteristics are good.
 
Drones are easy to replace. Cameras and people are not. It's good practice to choose an area away from people and remove the camera for the first few flights to ensure all flight characteristics are good.
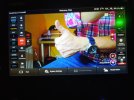
SUCCESS!!! Between two rains and with 14 sat. I flew it for the first time! And it works. Well, I didn't understand why I didn't get any video feedback in the field when I tested it at home. But I'd like to thank you very much for your help and support, and if I can help too, please don't hesitate!
Many thanks and bravo to you

Cobra1974
 

Attachments

  • VID_20230730_135107.zip
    21.9 MB · Views: 4
  • Like
Reactions: Steve Carr
SUCCESS!!! Between two rains and with 14 sat. I flew it for the first time! And it works. Well, I didn't understand why I didn't get any video feedback in the field when I tested it at home. But I'd like to thank you very much for your help and support, and if I can help too, please don't hesitate!
Many thanks and bravo to you

Cobra1974
Very Happy for you and well done TECH TEAM
 
Very Happy for you and well done TECH TEAM
Well done to WTFDproject and to all of you, because this type of drone is now 7 years old, and it lives on thanks to you, the enthusiasts, who keep it going. Yes, there are brands like Dji, but can they change their camera and install a thermal camera like the CGOEt? No, they can't. They have to fly on five motors instead of one. Fly with 5 engines instead of 6? Do a 180° without the drone moving? Have a great community like here?

Thanks again
 

New Posts

Members online

No members online now.

Forum statistics

Threads
20,977
Messages
241,831
Members
27,384
Latest member
TroyBoy