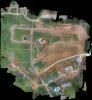
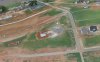
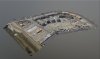
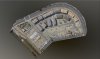
How does everyone determine altitude and spacing for surveys. I've done a couple now but it's been a bit of 'finger in the air' estimation when setting these parameters. Happy with the results but I'd be far more comfortable coming up with a way of setting them a bit more methodically.
For example, for a decent resolution and overlap for flying at 50m, what spacing would you use compared to that say at 30m for the same overlap?
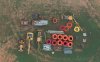
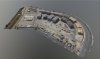
The other thing I've been doing which seems to make a decent difference is checking the 're-fly at 90 degree offset' box but, when undertaking the flight, tilting the camera to 45 degrees to capture the side of buildings and structures. Does anyone else do this?... Is it the 'done' thing?
For example, for a decent resolution and overlap for flying at 50m, what spacing would you use compared to that say at 30m for the same overlap?
The other thing I've been doing which seems to make a decent difference is checking the 're-fly at 90 degree offset' box but, when undertaking the flight, tilting the camera to 45 degrees to capture the side of buildings and structures. Does anyone else do this?... Is it the 'done' thing?


")