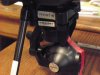
I had fedex break the gimball mount with the H in a pelican case. I now have a sperate case that I use specifically for the cameras so they can't be broken off. I highly recommend taking the cameras off if there is any slight chance the H might be tossed around in a case, no matter how good the case is.
Agreed. My big case is very deep and the camera attached does not touch the bottom. There is enough clearance that a good drop could knock the camera of the dampeners - like a hard landing and bounce - and rip those horribly mounted and poorly strain relieved camera wires. My other cases being backpacks, get slung around and tossed a lot and the camera is always fine. The other advantages of getting in the habit of camera dismounting after every flight are:
1. Quick check of dampeners, plates, and lens so it’s ready for next time.
2. Easy removal of SD card and routine of labeling and transferring
of media into proper project folders. This also creates the habit of emptying card to keep it clean and ready for next flight. That in turn helps guarantee removal of card from computer and confident reseat into camera that’s easy to do when removed.
3. Post flight kit reassembly becomes all critical parts checked as during camera capture, batteries and ST are charging so it’s camera back in bag first usually. I know it’s resting safely on the bottom of bag and the H goes in and out of the formed foam easily.
4. I can quickly calibrate the compass and not flip poorly because I’m fighting props or camera weight. I don’t like the gimbal motors working so hard to find level during calibration so I just don’t do it with the camera on.
5. I can do a quick test flight if needed if there any flight behavior checks or concerns and not risk the camera. That decision has saved me money by not crashing the camera.
6. I get to check the camera again to make sure no dampeners are off at pre flight. I hate jello in shots and one poorly seated dampener is all it takes to ruin your video.
7. Since I checked and cleaned my lens and filter post flight, I know when I remove protective cover right before Drone boot, my lens is untouched by me in the field. It’s also why I put the cover on before removing camera as my hands are oily and dirty from being outside.
8. Finally and most importantly, it makes me deal and check with the rails on the top plate that actually hold the camera secure. In a hard landing or bounce, they are supposed to break and leave the camera on the ground while your drone goes wherever. Yuneec choose a system that only works when the gear is down for this to happen. Most of us crash with gear up and the camera becomes the most damaged and is pretty tricky to repair. I’ve successfully ruined three in my attempts to fix so maybe just maybe it’s why I’m camera maintenance focused.
Finally, the CGO3plus is a pretty decent camera that with practice, produces very good video. I highly recommend the Captain Drone video on the AWB and histogram he produced last year when they did the last firmware upgrade. I found that his tips about how to lock your white balance are great and it changed how I set up the resolution, ISO, and shutter speed.