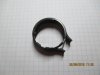
I didn't find any YT advice on disassembling the CGO3+ camera - there probably are some, but not for my specific damage. So, if you are somewhat mechanically/electronically inclined, have basic tools like a 1.5mm hex screwdriver, jewelers philips & flat head screwdrivers, tweezers, a scalpel or exacto knife, a sharpie marker, a digital camera or phone and are careful and patient, it is not that hard. First remove the camera from the aircraft, remove your SD card if present, next remove the lens/antenna cover by gently squeezing and pull off. Next remove the screws holding the 2 halves of the spherical cover together. then remove the screws holding the rear cover to the internal camera frame. Take photos every step to make reassembly easier. Keep screws in a magnetic cup or preferably keep in separate groups and make note of where each screw came from. From there, going by memory, I think remove the protective cup at the base of the YAW circuit board - it is just a snap-on piece. Then start removing the side covers of the vertical gimbal arm - (several screws). Remove the nameplate covers for the YAW and tilt frames. Remove the screws for the tilt encoder and remove...... so essentially it basically has to be stripped down completely so that the vertical gimbal frame is separated with no compnents attached to it. (Several more screws)
At this point, I would say before removing the connectors from the yaw circuit board, mark each plug with its socket with a unique mark and photograph. If you don't get the plug back in its correct socket...... well the whole camera may be trash. Removing the fine wires from the tilt encoder through the gimbal arm is tricky - be patient. Once the (bent) vertical arm is separated, slowly spread the extremities of the arm by grasping each end with your hands and gently apply force. Work slowly, you only want to get it back to its original 90° angle not beyond. Check it often with a small carpenter type square or other item you know has a right angle. Reassembly is the reverse of disassembly. Sometimes, the yaw positioning will not be normal and will need to be re-aligned with special software (repair centre). My yaw control seemed to work normally after reassembly.
Caveat: This is what I remember at the moment from my repair, and obviously there are steps not documented or possibly out of sequence. If you are not confident to tackle this, best to send it to a repair centre like Carolina Dronz or Terrestrial Imaging.